Showing posts with label Kitchie Tips. Show all posts

Tuesday, April 24, 2012

Kitchie Tip: Chopping Basil & Sage

Hello Friends!  I have been gone too long.  Waaay too long, and I miss you so much!  I have a good excuse, I promise.  I am not quite ready to share this excuse with you, but will soon.  Another promise. Its a fun, good, and really exciting excuse.  Now I am just torturing you and will shut my trap and move on to my next task.  A quick and simple Kitchie Tip.

I hate chopping herbs.  Hate it hate it hate it.  It is an annoying task and one I try to pawn off on others as much as possible.  I still don't have a great solution for the likes of cilantro, parsley and tarragon; but basil and sage?  I've got you covered.  

I learned this from a friend of mine, Taren, who is a Pampered Chef consultant and always has great tips and tricks for cutting down your time in the kitchen.  So here goes...

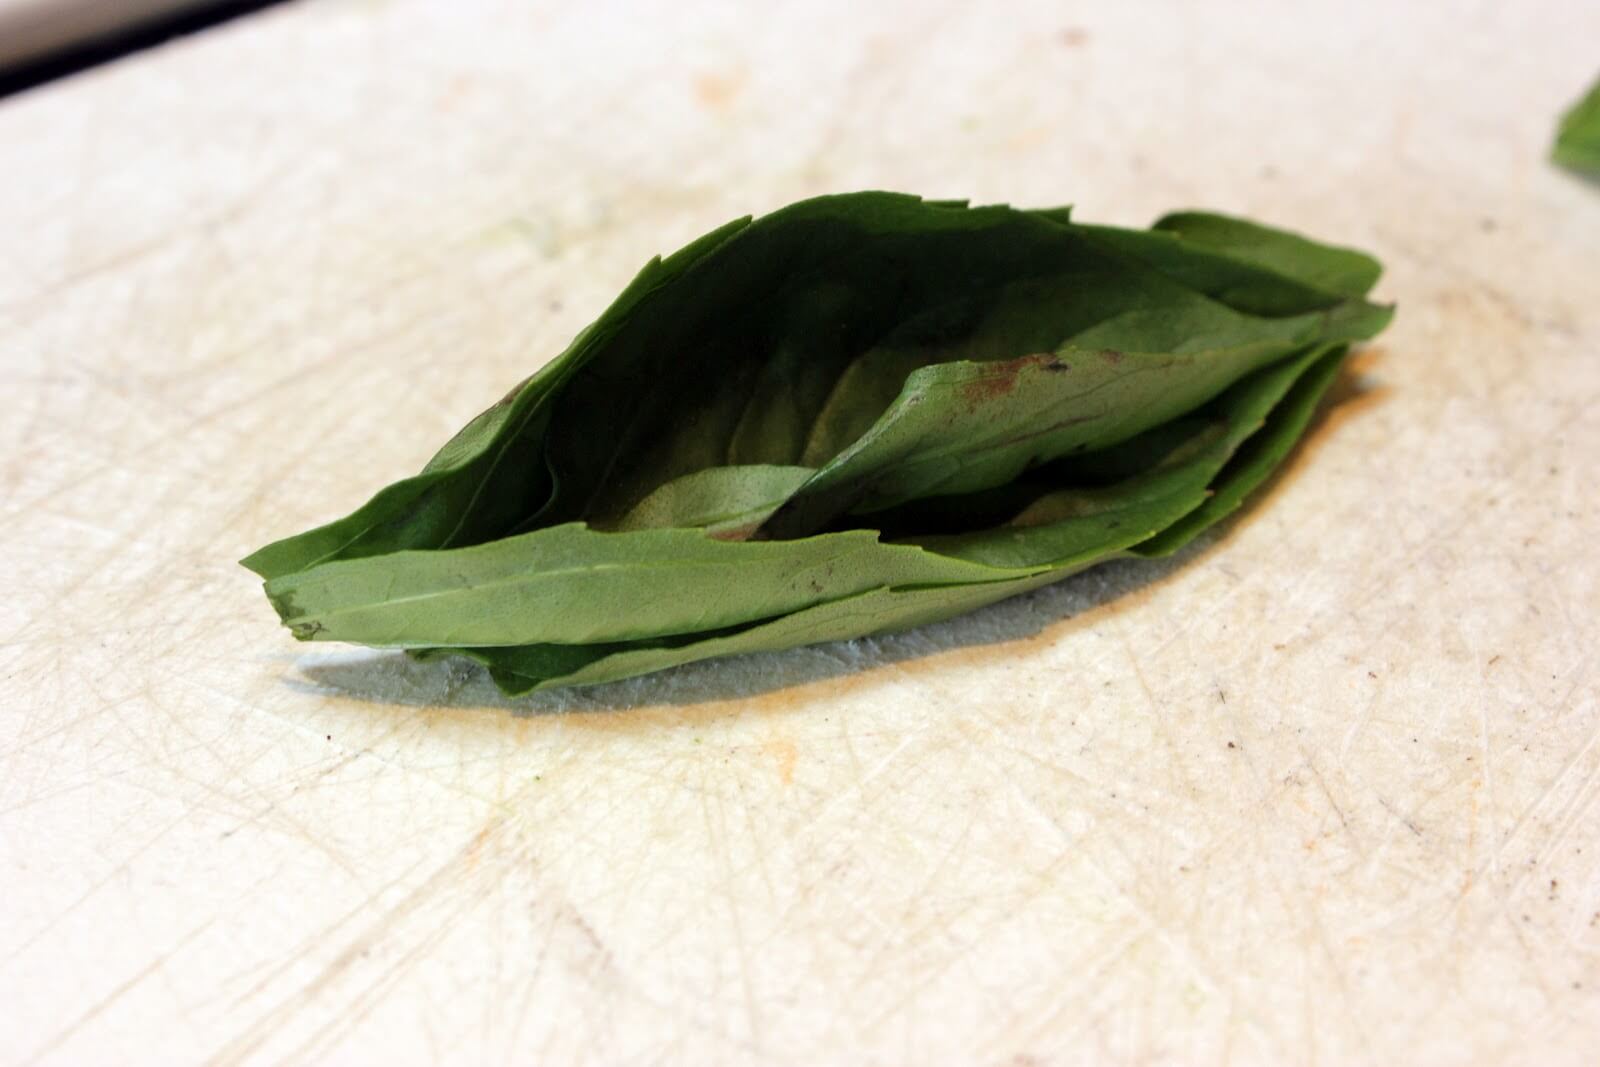
1. Stack the basil leaves
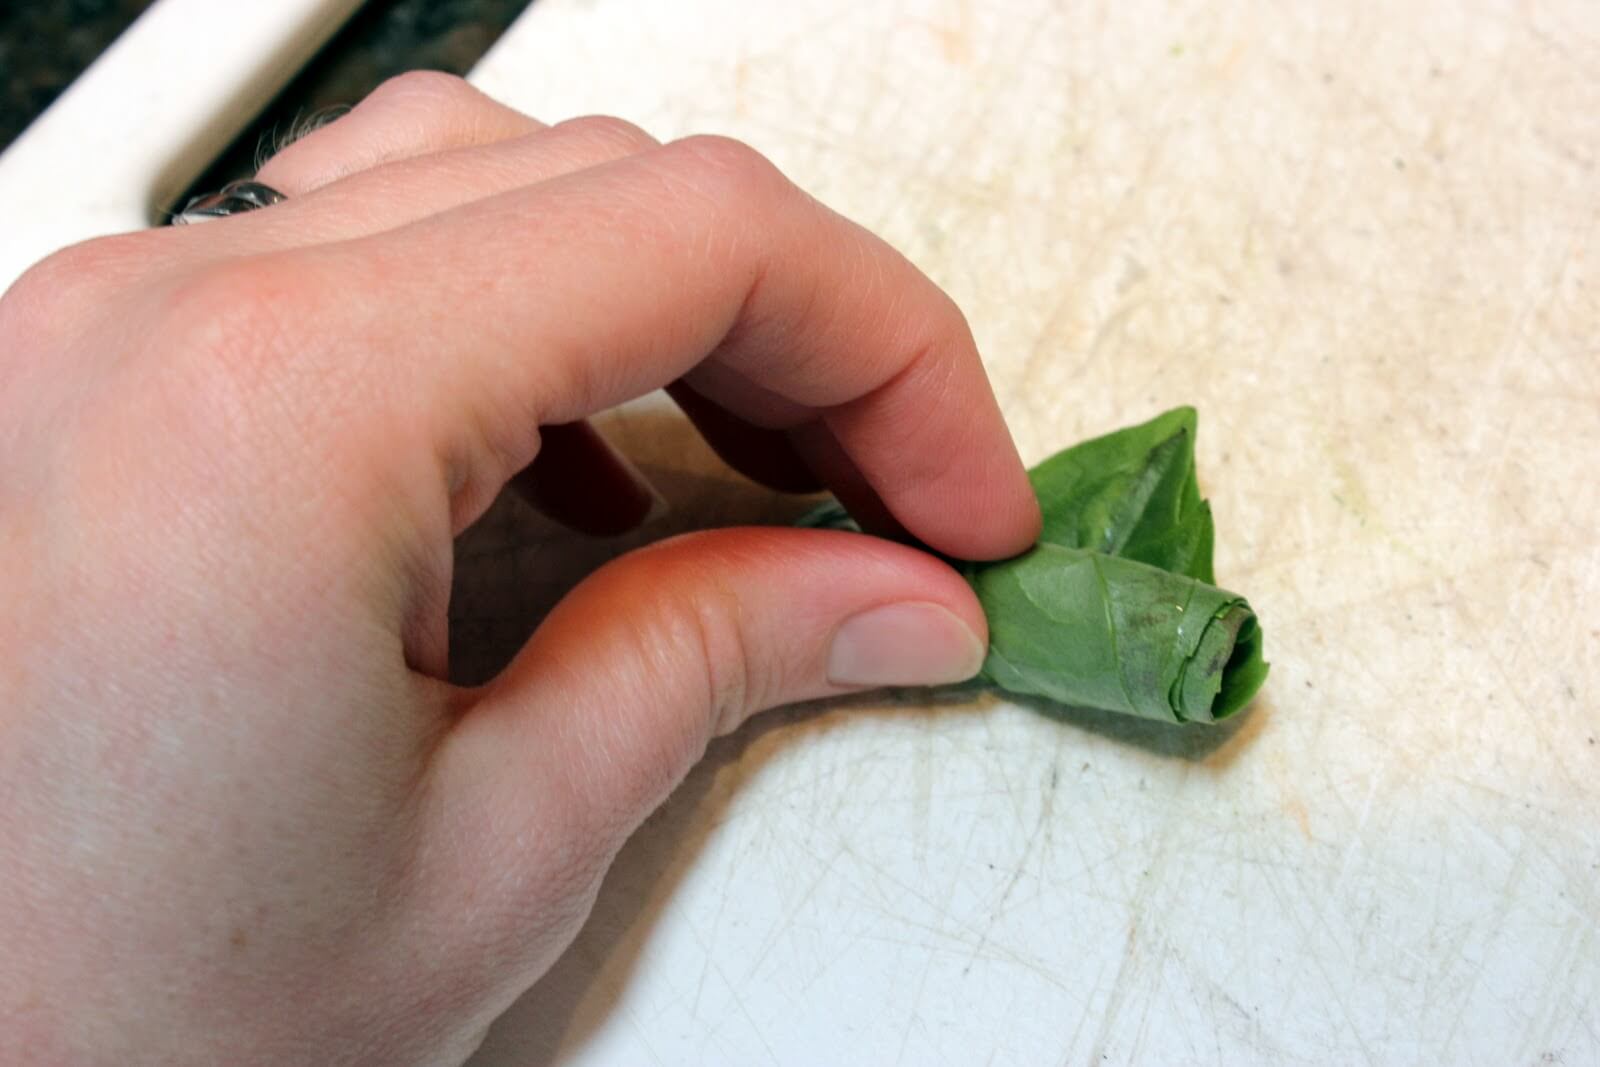
2. Roll the leaves
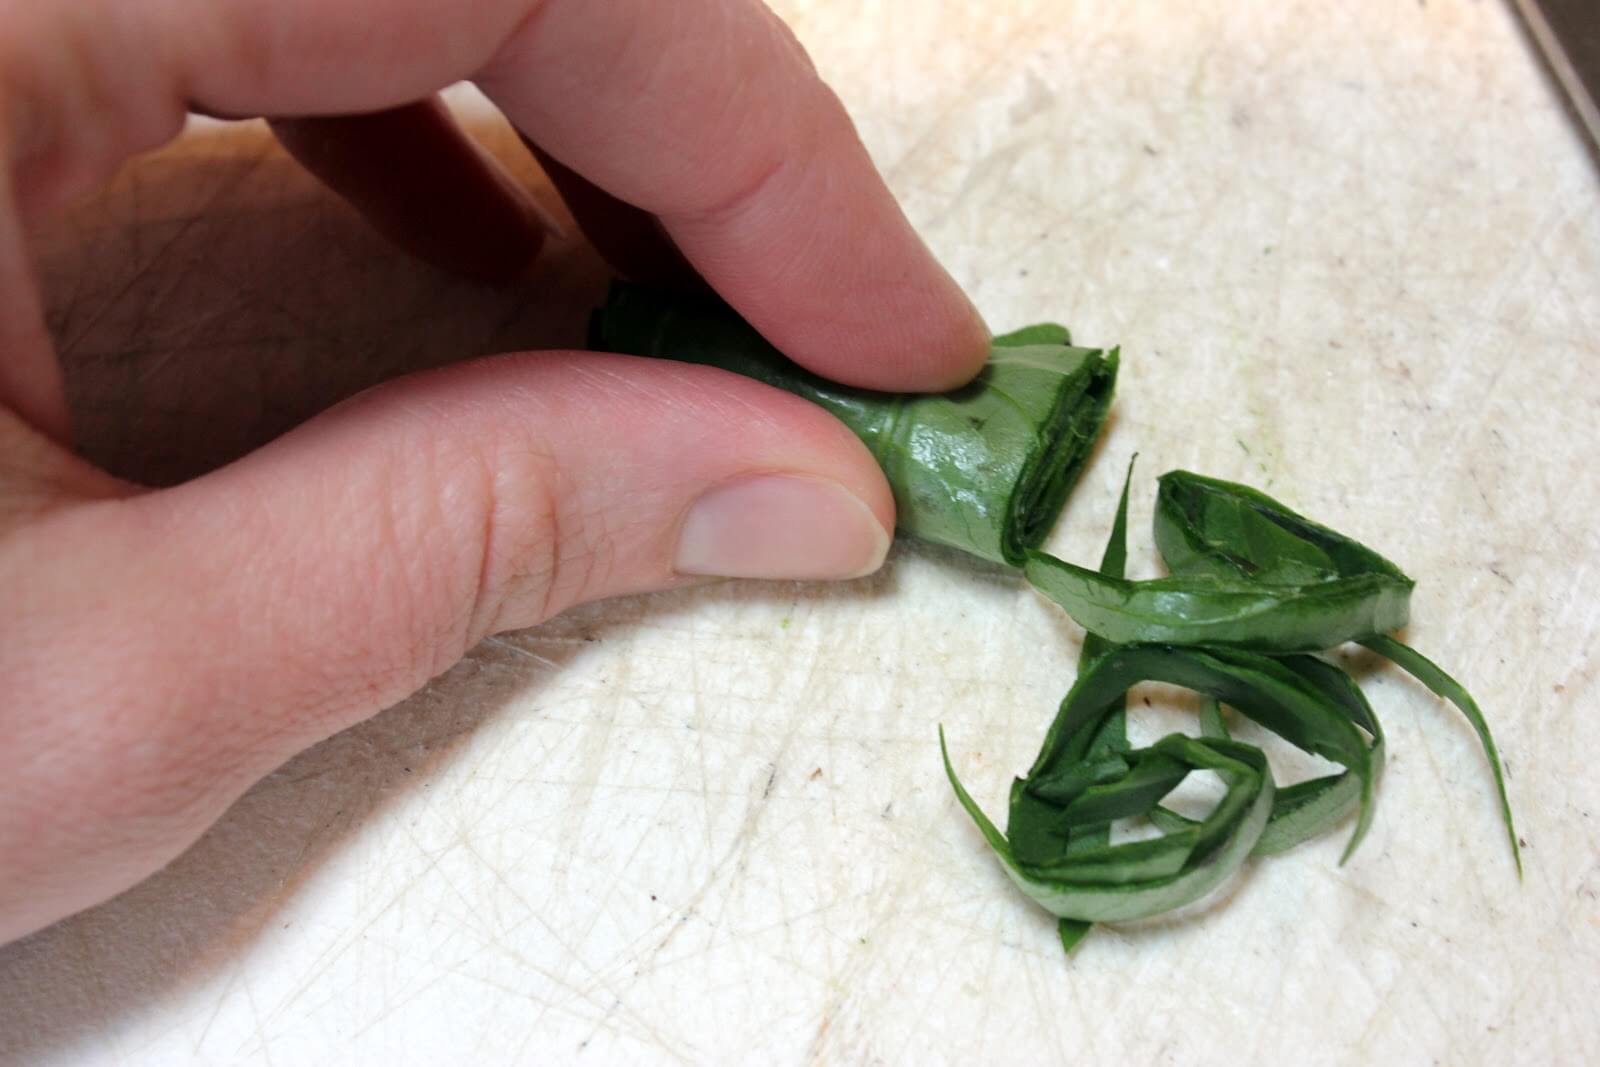
3. Slice the leaves crosswise
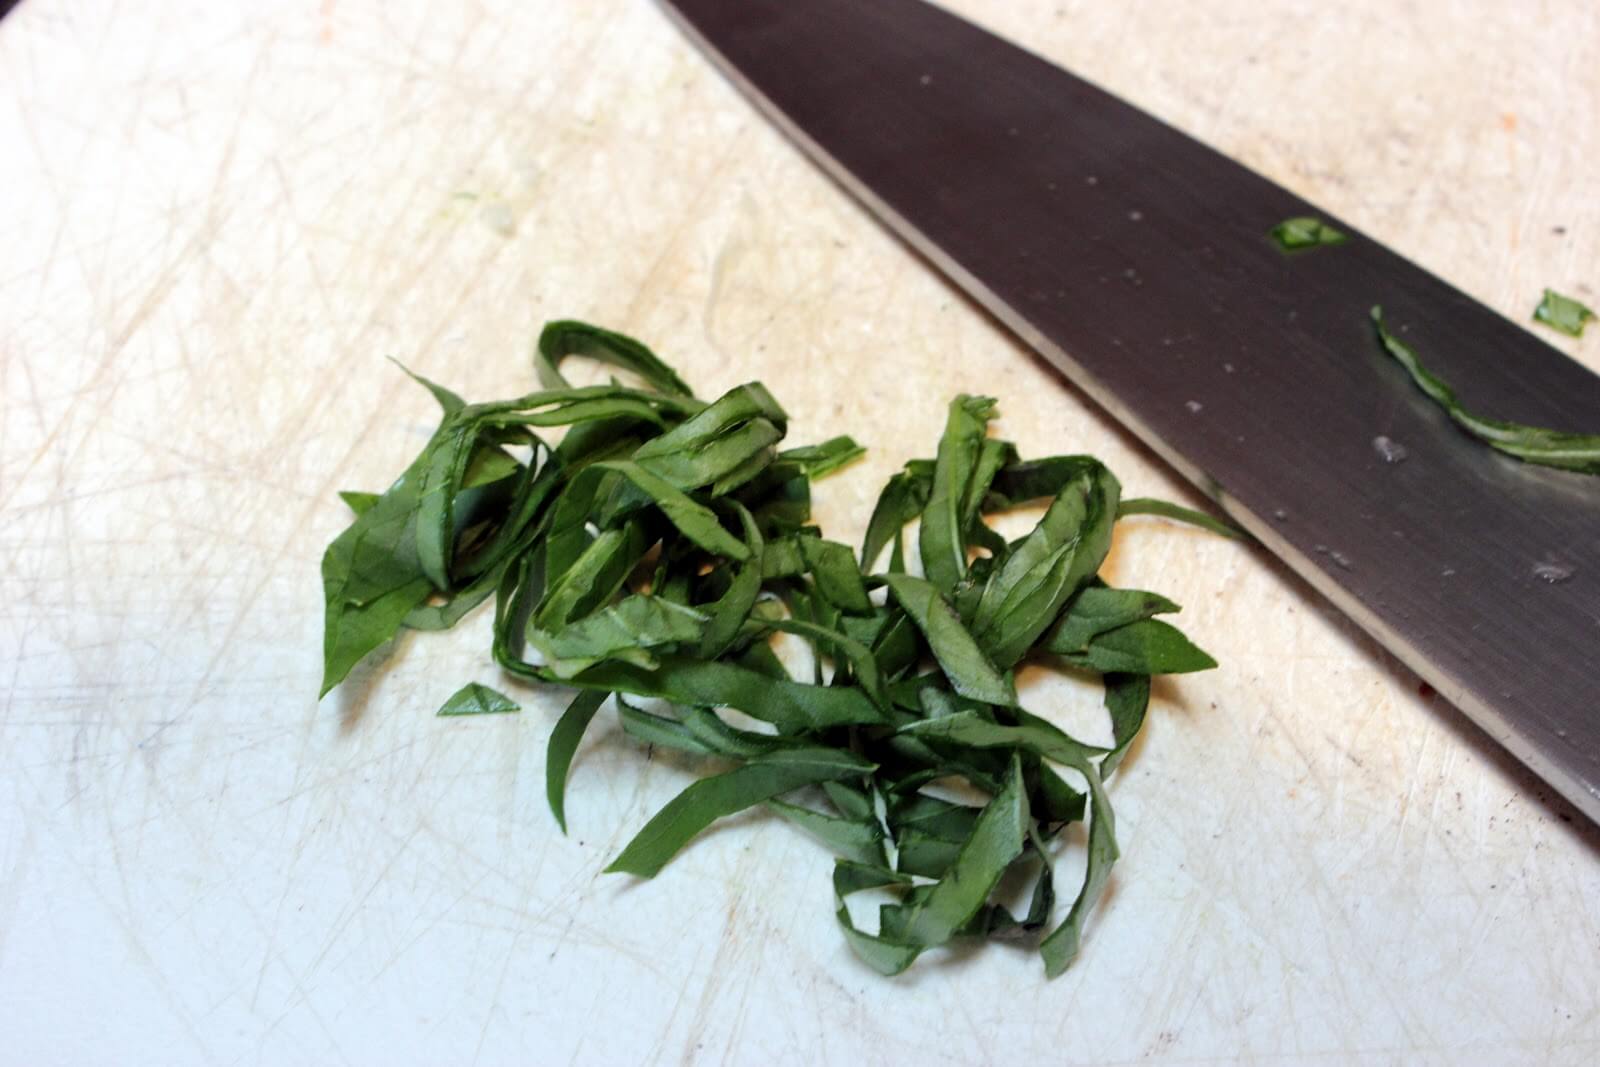
4. Done!  Ta-da!


Do any of you have any tips for chopping other fresh herbs?  Cilantro especially is my nemesis, which sucks, because I love it so much.  Love/hate relationship big time.

So.... 

I am loooong overdue for returning some major blog award love from some of my very favorite bloggers.  Please forgive me for my delayed thanks, and know that I am eternally grateful and full of love and pride for these awards.  Its amazing that even though I haven't written a food post in almost a month, the blog community love is still rolling in.  I adore you guys.

I received, not one, three, or five but SIX Versatile Blogger Awards!!  (Fainting... )  These kept rolling in from these lovely ladies, whom I adore for more reasons than giving me awards...so thank you my dear friends....Anna at Crunchy Creamy Sweet, Pennie at Passioneats, Jules at Bananamondaes, Kayle at The Cooking Actress, Jessica at A Kitchen Addiction and Kim at Treats & Trinkets.  Upon acceptance of this award I am supposed to share seven random facts about myself and then pass the award along to 15 of my favorite bloggers.  So, here goes:

1. I never had a huge sweet tooth until I got pregnant with my daughter Anna.  Now my sweet tooth has a tendency to be insatiable.
2. I wear sunscreen every single day of the year...sunny, rainy, cloudy or snowy!
3. French fries are my favorite food in the whole entire world.  And I do not discriminate.  No french fry is bad, there are just some that happen to be phenomenally better than others.  In fact, I usually pick where I want to eat out based on their french fries.  I love them.
4. I have a love/hate relationship with running.  I hate the thought of getting my butt out the door, but when I am done I find that runner's high and fall in love again.
5. I am an accountant, but I want to be a pastry chef. 
6. A good glass of wine and snuggling up with Mace and Anna is the perfect end to any day (and you might as well throw a few cookies in there to really top it off).
7. I am always cold.  When others are sweating, I am usually wearing a sweater.

I am having a hard time finding bloggers I love that haven't already received multiple Versatile Blogger Awards, so this one if up for the taking.  If you haven't received the Versatile Blogger Award yet, you're a blogger, and you're reading this, consider yourself awarded!  Please grab the badge below and continue spreading the love!


Secondly, I was given the Happy Blogger Award by Neshanne at Oishii Treats and Anna at Crunchy Creamy Sweet.  There are no special requirements for this award but to pass it along to 10 other bloggers.  I imagine it should be bloggers that exude happiness and sunshine, like the little award guy below!  :-)

I am passing this award on to ten very happy and sunshiney favorite bloggers of mine.  Thank you my friends for always bringing a ray of sunshine to my day!  Pennie at Passioneats, Kayle at The Cooking Actress, Chocolate Chip Uru at Go Bake Yourself, Leanne at Around the Table: Loving Food in RI & Beyond, Alyssa at Mom de Cuisine, Colleen at The Smart Cookie, Laura at Sprint 2 the Table, Krista at Cucina 49, Erin at Dinners Dishes and Desserts, and Stefanie at Sarcastic Cooking.


And finally...I was given two awards in one pretty little package, The Kreativ Blogger Award and the the Sunshine Award, by the Chocolate Chip Uru herself at Go Bake Yourself


For the Sunshine Award I am supposed to answer the questions below and then pass it along to 10 other bloggers.  For the Kreative Blogger award I am supposed to give randon facts about myself and I will defer to the above so as not to bore you all to death with an enormous amount of facts about me!


  • Favourite Colour – Blue, any shade
  • Favourite Animal – Dog
  • Favourite Number – 8
  • Favourite Non-Alcoholic Drink – Seltzer Water
  • Prefer Facebook or Twitter – Facebook, I still don't totally "get" Twitter.
  • My Passion – Being in the kitchen, especially baking
  • Prefer Getting or Giving Presents – Ah crap, I love em both.
  • Favourite Pattern – I don't get it...Is chocolate chip cookie a pattern?
  • Favourite Day of the Week – Friday, its the beginning of my weekend and I know I have a nice long weekend ahead of me every Friday morning when I wake up.
  • Favourite Flower – It so happens to be gerbera daisies which is the flower pictured in the award badge.  Nice.

  • I am passing this cute little award package on to the following bloggers: Neshanne at Oishii Treats, Anna at Crunchy Creamy Sweet, Rachel at My Naturally Frugal Family, Amy at Gastronome Tart, Kim at Treats & Trinkets, Jessica at A Kitchen Addiction, Tammi at Momma's Meals, Kyleen at Sixteen Beans, Aylin at Glow Kitchen, and Stephanie at Eat. Drink. Love.


    Sunday, March 25, 2012

    Kitchie Tip: How to Make Chocolate Curls

    Before getting to the promised task at hand, I have some majorly big business to address.  First, (I am still in a state of shock and disbelief) thank you so much to everyone that voted me into the FoodBuzz Top 9 on Friday!  The Dark Chocolate Mocha Buttercream Cake I made last weekend was both fun and therapeutic for me, and the fact that it made into the Top 9 was a major win for me.  So, thank you, thank you and thank you!  I actually started crying when I read the first email congratulating me on Top 9.  It means a lot.

    Second, I have a winner for the OXO salad spinner giveaway I posted last week.  The winner was lucky number 5, jwfong, which random.org selected for me.  Congratulations!  I'll be in touch shortly. 

    Now, onto the star of the show...chocolate curls (like the ones on top of my cake that made the Top 9, surely it was the curls that got it there).

    How-to: Chocolate Curls

    3 ounces chocolate (I used bittersweet)
    1 tablespoon coconut oil (shortening can be substituted)

    Melt the chocolate and coconut oil in the microwave in 30 second increments, stirring after each increment, until completely melted and smooth.

    Using an offset spatula, spread the chocolate on an overturned rimmed baking sheet, until smooth and evenly distributed.  Put the entire baking sheet into the freezer for 2 minutes. 


    Remove from the freezer and, using an overturned metal spatula (turner), lightly push the chocolate away from you to form the curls.  If the chocolate is too hard, it will not curl and will look like this:

    If this is the case, allow to sit at room temperature for 30-60 seconds more and then try again.  Repeat until the chocolate is the right temperature and the chocolate curls easily under the spatula, like so:


    The chocolate will melt very quickly if touched, so try to to move the chocolate to a ceramic plate or other cool surface using the spatula.  Put them in the refrigerator as soon as possible and keep there until you are ready to use them.

    Because the chocolate is spread so thinly, you will likely have to return it to the freezer several times during the curling process because it will begin to melt quickly.

    When you are ready to use the curls, remove from the fridge and work quickly to decorate your cake/cupcake/etc. touching the curls as little as possible.  Once you've gussied up your awesome dessert with these curls, go ahead...

    Eat it!!

    Tuesday, February 7, 2012

    Kitchie Tip: Flour Duster


    This lil guy?  He rocks my world.  He used to be an empty container with a sifter lid that I picked up at our local health food store.  He cost a whopping 99 cents.  I picked him up in the bulk spice aisle, so he was most certainly destined to be filled with something exotic like garam masala.  But I altered his destiny...I filled him flour and I use him lovingly almost every day.  How many spice jars can compete with that?

    I was tired of the constant mess I dealt with because of dusting the counters when working with dough.  So, when I saw something similar to this somewhere on-line, I knew I had to make my own.  Its a game changer.

    I always keep this on my counter so I can quickly grab it and dust flour to and fro! It sprinkles a light dusting of flour evenly and quickly.  It's always within arm's reach.  It means no more plunging my sticky, doughy hands into a bowl of flour and then having to throw the leftover flour out.  It is so purposeful.

    I use it to dust the counter when laying out pasta, to dust the top of my pie crusts as I roll them out, and I even use it when I'm kneading bread.

    You know you want one.  You know you deserve it.  So now, go out and get yourself a cute little spice jar with a sifter top and dust away!  It'll be the best 99 cents you've ever spent.

    Friday, January 13, 2012

    Kitchie Tip: How to Pit an Avocado

    Pitting avocados used to drive me totally bonkers.  I would lovingly cut an avocado in half to find two beautiful halves staring up at me...and then I would destroy the half with the pit.  I'd claw at that pit, or take a spoon or a fork to it, trying to relieve it of its duty in the center of that avocado.  Always, I would end up with a great big mess, avocado under my finger nails and a large portion of the avocado in a weepy mess next to its perfect other half. 

    My friend Jasper witnessed this horrific scene one day while I was preparing dinner.  He took the avocado from my hand and showed me this little dandy of a trick.  Another "duh!" moment in my cooking life.

    How to: Pit an Avocado

    First, slice the avocado lengthwise.  Twist the two halves in opposite directions and then pull them apart.  You will have two lovely halves.

    Now comes the fun part.  Take a knife and smack it into the center of that avocado pit, like so:


    Once you have the knife firmly in the center of the pit, give the knife a turn:


    The turn is enough to remove the pit from its stronghold and you can easily lift the knife and pull the avocado pit out.  Hooray!  You have two beautiful avocado halves!


    I'll share my guacamole recipe with you soon.  My husband drools over this and says nobody makes it as good as me.  Thanks darlin', not that you're prejudiced or anything, but I happen to think its pretty darn good too!  Stay tuned...

    Tuesday, December 27, 2011

    Kitchie Tip: Draining Spinach

    I love kitchen tips that make my life easier in the kitchen.  I love kitchen tips that make me bang my forhead with the palm of my hand and say "why the hell didn't I think of that?"  I have a lot of these to share with you.  Tips and processes that have continually made my life go from: frustrating and recipe-avoiding, to: duh and gimme-that-recipe!  So, because of this, today I am starting Kitchie Tips!  I hope that these tips will reach you, or anyone out there in desperate need of a shortcut, and make life easier in the kitchen.

    The first tip I want to share with you, is another lead-up to my much alluded to spinach and mushroom roll.  Come on, come on, let's get on with it Maggie.  I know this is what you're thinking.  I am getting there.  I am taking you on a journey.  This meal is all about the journey.  And at the end, you will have a beautiful and well-earned meal.  This I promise you.

    What I want to share with you is an invaluable tip I learned about draining cooked spinach.  I had been frustrated for years with pressing spinach in a strainer with the palms of my hand and still turning out watery, runny quiches and pastas.  I wish I remembered where I learned this tip from, but I don't.  So, whoever taught me this beautiful trick, thank you.  You deserve one million dollars for your insight.  Or at least some credit. 

    So, here goes:

    To drain all the water out of cooked spinach:

    1. Place the cooked spinach in a clean towel, that you don't mind getting stained, on a clean surface (counter or cutting board).  The spinach will stain your towel green and I now have a designated "spinach draining towel" I keep in my kitchen.


    2. Gather the towel around the spinach and wring it out, like you'd wring out a wet towel.


    3. Twist the towel back and forth in both directions several times, until you get all the water you can out of the spinach.

    4.  Unroll the towel and you will have perfectly drained spinach!  Use as directed in your recipe.