Showing posts with label Baking. Show all posts

Tuesday, December 9, 2014

White Chocolate Dipped Cherry Shortbread

Before we moved to Minnesota I spent an agonizing amount of time imagining who my new friends would be. Would I even have new friends? What would they look like?  Could they ever compare to and replace the friends I was leaving behind?  The answer is yes.  And no.  Just as I've learned that I love my children fully, equally and differently...I love and adore my new friends fully, equally and differently.  These women who invited me to join their lives, their play groups, book clubs and social events have completed my circle here.   I adore them, I adore their children, I adore how fully full they've made my life these past six months.  Blessed is the word that constantly comes to mind.


And did I mention one of these new friends of mine, Amber, hosted a cookie exchange party?  That's a sure way to get to my heart.  Nine women means nine different kinds of cookies.  Oh, how we've been buzzing around on a sugar high since Saturday night!


I also got to learn how to frost cookies using royal icing, and I am totally hooked.  This icing makes gorgeous cookies!  Thanks for the intro Dawn!


And I got to try an awesome new cookie recipe to bring to the party.  This one will be added into my holiday repertoire from now on.  Cherry shortbread dipped in white chocolate.  Oh my!  Although, the finished product looked a little bit like a Santa with a hat but no facial features, so I can't decide if they are cute or creepy. Thoughts?


Life is good.  God is good.  My heart is full.  I am blessed this holiday season beyond measure.

PRINT THIS RECIPE!

White Chocolate Dipped Cherry Shortbread
Adapted from BHG

Makes 30 cookies

1/2 cup maraschino cherries, drained and chopped finely
2 1/2 cups (350 grams) all-purpose flour
1/2 cup (100 grams) sugar, plus 1/2 cup extra for rolling
1/2 teaspoon kosher salt
1 cup (2 sticks) cold unsalted butter, chopped into 1/4" pieces
12 ounces white chocolate, chopped finely
1/2 teaspoon almond extract
Colored sugars or nonpareils for decorating

Preheat oven to 325F.

Spread cherries on a layer of paper towels.  Place another paper towel on top and press lightly to absorb excess moisture.  Set aside.

In the bowl of a stand mixer fitted with the paddle attachment, or in a large bowl, combine flour, sugar and salt and mix briefly to combine.  Add cold butter and mix on medium-low, or use a pastry blender, until the dough resembles coarse meal.  Add cherries, 4 ounces (2/3 cup) of the chocolate and the almond extract.  Knead the mixture with your hands until it comes together and forms a smooth ball.

Form dough into 1 tablespoon balls and then roll in extra sugar to coat.  Place on cookie sheet approximately 2" apart.  Dip the bottom of a drinking glass in the sugar and then flatten each dough ball.  Bake for 10-12 minutes, until centers are set, then set on a wire rack to cool.

Once cookies are completely cooled, melt remaining white chocolate in a microwave safe bowl by cooking for 15 second intervals and stirring after each 15 seconds until completely melted.  Dip half of each cookie into the white chocolate, then dip in colored sugar or nonpareils for decoration. Lay on parchment paper to dry and harden completely.  Then, you should definitely...

EAT IT!


Tuesday, September 9, 2014

Brown Butter Baked Donuts


We started making donuts this summer and: We. Can't. Stop.  They have brown butter.  They are moist. They have a billion possibilities for flavors. The are delicious.  They have brown butter.

Mace accidentally bought me a donut pan when he used my Amazon account to order something for himself.  The donut pan was a splurge I'd been pondering buying and threw it in my cart.  Mace figured since it was in my cart, it was a sure deal.  Two days later I was the proud owner of this donut pan!


I originally found this recipe on Joy the Baker and fell in love with it.  I've tweaked it to include more brown butter (duh), the addition of cinnamon and given a few other topping suggestions.  The kinds of toppings you can put on these are truly endless...chocolate, white & almond glazes, nuts, sprinkles, cinnamon & sugar, and my personal favorite: chocolate glaze with toasted coconut and pecans.  My friend Hope, who has been maniacally making donuts as well, told me she stirred a little milk into some Nutella and dipped the donuts in it.  That will likely be my next favorite flavor.


Decorating the donuts is a super fun thing to do with young kids.  It has become a major activity in our house, especially when our friends with kids come to visit.  Just keep your eye on them so they're not licking their fingers after dipping every donut (like, ahem, Miss Anna always seems to do).


Brown Butter Baked Donuts
Adapted from Joy the Baker

Makes 12 donuts

Donuts:

6 tablespoons unsalted butter
2 cups (280 grams) all-purpose flour
1 1/2 teaspoons baking powder
1/2 teaspoon baking soda
1 teaspoon salt
1 teaspoon cinnamon
2/3 cup (150 grams) granulated sugar
2 large eggs
1 cup buttermilk
2 teaspoons vanilla extract

Glaze:

3 cups powdered sugar
6-8 tablespoons

Optional add-in ideas:
6 tablespoons cocoa powder
1 teaspoon vanilla extract
1/2 teaspoon almond or any other extract

Topping Ideas:
Toasted nuts
Toasted coconut
Sprinkles
Chopped, dried fruit
Cinnamon and sugar

Preheat oven to 350F.  Grease a donut pan with oil or non-stick spray.

To make the donuts: In a medium saucepan, melt the butter on medium-high heat, swirling the pan continuously, until the butter is light brown and has a nutty fragrance.  Watch the butter carefully and remove from the heat as soon as it browns to avoid burning.  Set aside to cool slightly.

In a medium bowl whisk together the flour, baking powder, soda, salt, cinnamon and sugar. In another small bowl whisk together the eggs, buttermilk and vanilla extract.  Slowly whisk in the slightly cooled brown butter.

Add the wet ingredients all at once to the dry ingredients and fold in until mixed and no flour streaks remain.  

At this point you can either spoon the batter into the donut pan, about 2/3 full, or pipe it in.  I prefer to pipe it in because I feel its less messy and the donuts turn out more uniformly shaped.  To pipe the batter in, fill a pastry bag or gallon ziploc bag with the batter.  If using the ziploc bag, snip a small bit off one of the corners of the bag.  Pipe the batter directly into the donut pan, about 2/3 full.

Bake for 10-12 minutes, or until the donuts spring back when you touch them.  Set aside to cool in the pan while you make the glaze.

To make the glaze: stir 6 tablespoons of milk into the powdered sugar, and cocoa if using, and stir until all lumps are out of the glaze.  Add extracts at this point, if using,  Add more milk as necessary to have a thick but pourable glaze.  

Topping the donuts: Once the donuts have cooled, pop them out of the pan by either using a fork or turning the pan over onto a cooling rack.  Put the cooling rack over a cookie sheet to catch the glaze drips and make for easier cleanup.   If using other toppings besides glaze, put them on a small plate.

Dip each donut into the glaze halfway, then pick up and dip into the topping of your choice.  Return to the cooling rack and repeat with the remaining donuts.  Then you should...

EAT IT!!

Tuesday, September 17, 2013

Raspberry Streusel Bars


Something I love about our new lives is the absolute presence of my husband.  For the past three years he was so engulfed by grad school, that being completely present was, understandably, challenging.  These past couple months, since he started working, he has been 110% present in everything we do.  We get out and do things without a deadline and with total leisure.  We enjoy each other, our children, basking in the indulgence of just being together. Oh, the simple pleasures.

Last weekend we decided to take a family outing to Afton Apple Orchard to pick raspberries and apples.  If you know anything about my eldest, its that this girl loves berries more than almost anything on earth.  Girlfriend would eat them breakfast, lunch and dinner if we could afford it.  So, this was obviously heaven on earth to her.  At first, the price of $4/pint seemed steep to us for pick-your-own raspberries...until we realized that we all likely ate our weight in raspberries while we were picking them.


It was a day that was so hot and humid that it was hard to breathe, but it didn't matter an ounce.  We were together, and we were basking in the hot sweaty glow of our togetherness.

We gorged on raspberries and apples.


There was a petting zoo and we met this guy.

Llamas are hilarious by the way.

And when we got home, I made these delicious raspberry bars.  Actually, delicious doesn't quite capture the essence of these bars.  Amazing, awesome. So. Damn. Good. There is 18 tablespoons of butter in one little 9' x 13" pan.  If that doesn't clear up how good these bars are, then you probably don't know anything about butter (I forgive you)...but you'll still love these bars.


PRINT THIS RECIPE

Raspberry Streusel Bars
Serves 12-15
Adapted from Cooks Illustrated

2 1/2 cups (12 1/2 ounces) all-purpose flour
2/3 cup (4 2/3 ounces) granulated sugar
3/4 teaspoon kosher salt
1 cup (2 sticks) + 2 tablespoons unsalted butter, divided, cut into 1" pieces and softened
1/4 cup packed (1 3/4 ounces) brown sugar
1/2 cup (1 1/2 ounces) old-fashioned rolled oats
1/2 cup pecans, finely chopped
3/4 cup (8 1/2 ounces) raspberry jam
3/4 cup (3 1/2 ounces) fresh raspberries

Adjust oven rack to middle and preheat oven to 375F.  Line 9" x 13" pan with tin foil, allowing it to hang over the edges to easily remove the bars later.  Grease foil and set aside.

Using a stand mixer fitted with the paddle, mix flour, granulated sugar and salt on low speed until combined.  Add the 1 cup of butter a piece at a time, then continue mixing until the mixture resembles wet sand, about 1 to 1 1/2 minutes.

Measure 1 1/4 cups loosely packed flour mixture into a separate medium bowl and set aside.  Dump the rest of the flour mixture into the prepared pan and, using clean hands, firmly and evenly press the mixture into place to cover the bottom of the pan.   Bake until the edges begin to brown, about 14 to 18 minutes.

Meanwhile, add brown sugar, oats and pecans to the reserved flour mixture and stir with a wooden spoon until combined.  Add the remaining 2 tablespoons of butter and work it into the mixture by rubbing it between your fingers until the butter is incorporated.

Combine jam and raspberries in a small bowl and mash gently with a fork until combined but some raspberry pieces remain.

Spread jam mixture evenly over the hot crust.  Sprinkle the streusel topping evenly over the jam, but do not press it into the topping.  Return pan to the oven and bake until the streusel is a deep golden brown and the jam is bubbling, about 22 to 25 minutes.

Allow to cool to room temperature on a wire rack for 1 to 2 hours, then remove the bars from the pan by lifting the overhanging foil.  Cut into squares to serve, and then you most certainly should...

EAT IT!!


Sunday, July 21, 2013

Burger Buns


I am flabbergasted that it has taken me this long to post this recipe.  I make these buns at least once a week and they are the most requested bread item from Mace and the rest of my family.  I think they are so ingrained in my brain and my daily life that they never hit my blog radar.  Utterly flabbergasted.

These buns are easy to make, requires ingredients you already have on hand (granted you are a frequent bread maker and have yeast), and so soft, supple and delicious you will not be able to eat just one. I make them often to go with turkey burgers and hamburgers, but the leftovers are great toasted the next day for sandwiches or breakfast with a bit of PB&J.

If you are anything like me and are obsessed with your kitchen scale, then you may take the extra step and weigh out each bun so they are exactly the same size.  Although, this isn't necessary (unless, as I said, you are scale obsessed and then this is absolutely necessary).  The only true advantage to weighing the rolls is that you won't have to worry about snatching the biggest roll for yourself because they are all the same size!


There have been studies done on the affect that fresh baked bread has on people's emotions.  I am not a scientist and don't really remember the actual results of this study, but I know that it makes people happy.  I know this to be true because we are always happy when we have fresh baked rolls in the house.  I never regret having homemade bread in the oven or in my mouth.  You won't regret it either...promise.


French Bread Rolls
Makes 12 rolls

1 1/2 cups warm water (approx 110 degrees)
2 1/4 teaspoons (1 package) active dry yeast 
1 tablespoon granulated sugar
2 tablespoons olive oil, plus more for brushing
1 1/2 teaspoons kosher salt
4 cups all-purpose flour

In the bowl of a stand mixer fitted with the dough hook, combine the water and yeast and allow to sit for approximately 5 minutes.  Once the yeast proofs (this is when it rises to the top and is slightly foamy) add the sugar, olive oil, salt and 3 cups of flour.

Mix on low speed until the dough comes to together.  Add the remaining one cup of flour a little at a time until the dough comes together completely and a ball forms (you may not need the entire cup).  Once the ball forms, continue to mix on low for another 4-5 minutes until the dough becomes smooth and elastic.

Put the dough in a well oiled bowl and then turn the dough over once so the oiled side is up.  Cover tightly with plastic wrap and allow to sit in a warm place for approximately one hour or until the dough is doubled in size.

Punch the dough down and divide into twelve equal pieces.  If you are weighing the dough they will be approximately 85 grams each.  Shape each piece into a ball (fine cooking has a great tutorial here) and then flatten each piece with the palm of your hand.  Flattening them will give them less height and more girth.

Put the rolls on a baking sheet lined with parchment paper or a silpat mat approximately 1" apart. Sprinkle flour generously on top of the rolls and then cover with plastic wrap.  Allow to rise 30-45 minutes or until doubled in size.

Meanwhile...preheat the oven to 400 degrees F.

Once the rolls have doubled in size, remove the plastic wrap, and then using a sharp knife cut two parallel lines in the top if each roll.  This is purely decorative, so if you want to make crisscrosses or nothing at all, it is perfectly fine.  Brush the top of each roll with olive oil and then bake for 12-14 minutes or until the rolls are light golden brown. Allow to cool on a wire rack for 20-30 minutes, or they are also delicious warm so you can also just go ahead and...

EAT IT!!


Friday, July 12, 2013

Maple Glazed Oatmeal-Pecan Scones


Better late than never, we got our Claire Bear baptized the last weekend in June.

At the drive-in movie theater.  Uh huh.

I'll fess up, it is no longer a drive-in movie theater, but a former one that our church has transformed into the funkiest, coolest, most eclectic Sunday morning worship locale around.


It may sound like an odd place for church, but oh, can you feel God's presence in so many ways...


And truly, how many people can actually say that they were baptized at a drive-in movie theater?  Well, at least one...our little Bear.


After the service we headed to my parents home for a brunch.  I made scones.  60 of them to be exact.  Scones loaded with pecans, oatmeal, cranberries and maple syrup.  They were divine. These scones were the right amount of moist so that they weren't dry and crumbly like a lot of scones, but not so moist they were muffiny.  I might go so far as to say these are my favorite scone of all-time.  They were darn good, and the perfect way to celebrate our Claire.


Maple Glazed Oatmeal-Pecan Scones
Adapted from flour

Makes approximately 10 scones

Scones:
1 1/2 cups (210 g) all-purpose flour
1 1/4 cups (125 g) old-fashioned rolled oats
1 1/2 teaspoons baking powder
1/4 teaspoon baking soda
1/4 teaspoon kosher salt
1/2 cup (50 g) pecans, toasted and roughly chopped
1/2 cup (80 g) dried cranberries
1/2 cup (1 stick) cold unsalted butter, cut into 8 pieces
1/3 cup (80 g) cold cream
1/2 cup (160 g) pure maple syrup (don't even think about using the fake stuff, gross)
1 cold egg

Maple Glaze:
1 cup (140 grams) powdered sugar
3 tablespoons maple syrup
1-2 tablespoons water

Heat the oven to 350F degrees.  Line a baking sheet with parchment paper or a non-stick mat.

Using a stand mixer fitted with the paddle, mix together on low speed the flour, oats, baking powder, baking soda, salt, pecans and cranberries for 15 seconds or until well combined.  Scatter the butter on top of the flour mixture and beat on low speed for 30 seconds or until the butter is slightly broken down and grape-sized pieces are still visible.

In a small bowl, whisk together the cream, maple syrup and egg until thoroughly combined.  On low speed, pour the cream mixture into the flour mixture and beat for 20-30 seconds or until the dough just comes together.  The dough will still be fairly wet.  

Remove the bowl from the mixer and using a rubber spatula, scrape down the sides and bottom to ensure all the ingredients are mixed into the dough.  Using a 1/4 cup measuring cup, drop mounds of dough onto the prepared baking sheet, approximately 2 inches apart.

Bake for 20-25 minutes, or until the scones are golden brown.  Transfer to a wire rack to cool for at least 30 minutes.  

While the scones are cooling, make the maple glaze.  In a small bowl, whisk together the powdered sugar, maple syrup and enough of the water to make a smooth and pourable glaze.  (The glaze can be made a week ahead of time and stored in an air-tight container at room temperature.)  Once the scones have cooled for 30 minutes, brush the tops evenly with the maple glaze and then...

EAT IT!!


Wednesday, May 30, 2012

Foodzilla


Its true.  I have officially become Foodzilla.  I couldn't help it, I just snapped. Why?  Someone  said they were bringing a store-bought grocery store cake to an event where I was planning all of the food.  Uh-uh.  That ain't happenin' sister.  EVER.  Keep that crap as far away from me as you can, or I will go all crazy Kung fu Panda on your ass.  Not cool.

I was able to smooth things over after my initial reaction: pure rage.  We talked respectfully to each other, she heard my side of the story and promised me "no store-bought grocery store cake".

GAWD!  When did I turn into such a food snob?

In all fairness, I was jointly planning this event with someone who knew nothing of my skills in the kitchen, and in the end everyone was pleased.  The food was for a good friend's bridal shower and it all went off without a hitch.  The favorite of the day?  German Chocolate Cheesecake.  Uh huh.

Me and Ashley, the bride-to-be

It fills me with unreasonable amounts of joy to plan menus, cook for hours and then watch people devour my works of "art".  And this time I got to cook and create alongside my best girlfriend, her mom and our three amigos.  It was the most fun I've had in the kitchen in a long time.  If anyone else wants to get married  I'd be happy to throw you a shower...or at least make you a bunch of food!


German Chocolate Cheesecake
Adapted from Midwest Living
Serves 12-14

Cheesecake:
4 ounces bittersweet chocolate, chopped
9 graham cracker sheets
1/2 cup pecans
6 tablespoons unsalted butter, melted
1/4 cup sweetened flaked coconut
24 ounces cream cheese, softened
3/4 cup sugar
1/2 cup full-fat sour cream
2 teaspoons vanilla
2 tablespoons all-purpose flour
3 eggs

Topping:
1/2 cup (1 stick) unsalted butter
1/4 cup brown sugar, packed
2 tablespoons cream
2 tablespoons corn syrup
1 cup sweetened flaked coconut
1/2 cup pecans, chopped
1 teaspoon vanilla
2 ounces bittersweet chocolate, chopped

To make the cheesecake: Preheat oven to 350F.

Melt the chocolate in a microwave safe bowl on high power for 1 minute.  Stir the chocolate and if it isn't melted continue to microwave in 20 seconds increments until chocolate is smooth and melted.  Set aside to cool.

Add graham crackers to the bowl of a food processor and process until finely ground crumbs are formed.  Pour crumbs into a medium sized bowl.  Add pecans to processor bowl and process until finely chopped (make sure not to over-process or you will end up with pecan butter!) and add to the bowl with the graham cracker crumbs.    Add coconut to bowl, stir until well combined and then pour melted butter over the top.  Stir with spoon or using your hands until butter is thoroughly incorporated.  Press into the bottom of a 10-inch springform pan.  Bake for 8-10 minutes or until slightly browned.  Set aside.

Increase oven temperature to 375F.

In the bowl of a stand mixer beat cream cheese, sugar, sour cream and vanilla on medium speed until thoroughly combined, about 2-3 minutes.  Add the flour, beat well.  Add the eggs and cooled chocolate and beat until just combined.

Pour cream cheese mixture on top of the crust and bake for 45-50 minutes, or until the center appears to be almost set when you jiggle it.  Cool on a wire rack for 30 minutes.

To make the Topping:  In a small saucepan, melt butter.  Add brown sugar, cream and corn syrup.  Cook over medium heat until bubbly, stirring constantly.  Stir in the coconut, pecans and vanilla.  Remove from heat and allow to cool 5 minutes.  Melt the chocolate in a microwave safe bowl and set aside to cool.

Using a knife, gently trace the inside of the pan to release the cheesecake from the sides, then loosen the side of the springform pan and remove it.  Spread the coconut topping over the cheesecake (the cheesecake will still be warm).  Using a spoon, drizzle the melted chocolate over the coconut.  Garnish with a few whole pecans if desired.

Put the springform ring back on the cheesecake, then cover with plastic wrap and refrigerate for at least 3 hours before serving and then...

Eat it!!!


Saturday, May 5, 2012

Pecan and Cinnamon Rolls


I am something of a pecan fanatic.  I love them with a fervor not given to other nuts.  I do like other nuts, but I adore pecans.  They make me gush with foodie love, especially when inserted into an ooey-gooey caramely breakfast roll.  I could plunge head first into this plate of pecan rolls and eat them all up - oh wait, that actually happened.  Oops.  Don't tell anyone, ok? 

These rolls made an appearance in our kitchen after I picked up my darling Tassajara Bread Book to find something fun to make for breakfast last weekend.  Just before I started scattering nuts to and fro on the dough, I remembered that Anna can't eat nuts yet.  So, I made a quick decision and divided the dough in half (okay to be fair, maybe it was more of a 25/75 split) and made the other part into cinnamon rolls.  Phew, good save Momma!  I never would have forgiven myself for stuffing my face with pecan rolls while Anna watched empty handed.


These buns also gave me a really cheesy way to share some really exciting news with you all.  I promised you last week that I was going to fill you in on why my blog has been mostly silent for the past month.  So, here goes...I've got a bun in the oven...figuratively and literally!  Damn I'm funny.  I think the morning sickness has completely subsided now (obviously, or I probably wouldn't have been able to even look at these buns) and I am back in kitchen action!  Hooray! 

Our newest addition is due on November 18th and we are thrilled beyond belief that Anna is going to be a big sister.  And such a great big sister she will be.  She's become mildly obsessed with babies lately, which may be a coincidence, or else the fact that we talk about babies mildly obsessively lately. 


Our family is growing, and this Momma is gushing with love and excitement.  It will be a big change, but can it really be a bigger change than going from zero to one?  Umm...don't answer that. Let me live in ignorant bliss for just a few more months, ok?


So, back to the rolls.  Unless you are a very early riser, I'd recommend making these rolls in their entirety the night before and giving them their final rise in the refrigerator overnight.  This recipe calls for three rises, which calls for lots of time, which I don't have in the morning (unless we eat breakfast at 1pm).  I took them out of the refrigerator about a 45 minutes prior to baking to bring them to room temperature.  This whole process worked out beautifully, and my family was rewarded with a stunningly delicious breakfast and full happy tummies. 


Pecan and/or Cinnamon Rolls
Adapted from Tassajara Bread Book

Makes approx 10 rolls

Dough:
1 cup warm water
1 tablespoon plus 1/2 teaspoon active dry yeast
3 tablespoons sugar
1/3 cup dry milk powder
1 egg
3 cups all-purpose flour 
3 tablespoons melted butter or canola oil
1 1/4 teaspoons kosher salt

Filling:
for both cinnamon and pecan rolls:
1/4 cup melted butter
1/3 cup brown sugar, packed
1 tablespoon cinnamon

additional ingredients for pecan rolls:
1 cup pecans, chopped
6 tablespoons butter, cut into small pieces
1/2 cup brown sugar, packed

Glaze for Cinnamon Rolls:
1 cup powdered sugar
1/4 cup milk or cream

To make the dough: dissolve the yeast and sugar in the warm water and allow to sit for 5-10 minutes or until foamy.  Stir in dry milk and egg to combine.  Add 1 1/2 cups flour, forming a thick batter and then stir for about 30 seconds.  Allow to rise for 30 minutes.

Fold in the butter or oil and salt.  Add one cup flour and mix using a stand mixer fitted with the dough hook, or a stir with stiff wooden spoon, until the dough pulls away from the sides of the bowl.  Knead in a stand mixer or with your hands, adding additional flour as necessary until the dough is smooth and elastic.  Allow to rise for 40 minutes. 

Preheat oven to 375F.

On a floured surface, roll the dough into a 10" x 15" rectangle.  Brush the melted butter on the dough, covering the entire surface.  Sprinkle brown sugar and cinnamon evenly across the dough.  If making pecan rolls, distribute 1/2 cup chopped pecans across the dough. 

Starting at the long edge closest to you, roll the dough away from you into a tight log.  Cut the dough log crosswise into 3/4" thick rounds.

For Cinnamon Rolls:
Place the rolls on a greased baking sheet about 2" apart.  Bake for 20-25 minutes or until golden brown.

Meanwhile make the powdered sugar glaze by stirring powdered sugar and milk together.  While the rolls are still warm, brush with the powdered sugar glaze.  Serve warm.

For Pecan Rolls:
Using two 8" square cake pans, dot the bottom of each pan with 3 tablespoons of butter and sprinkle with 1/4 cup brown sugar.  Sprinkle remaining 1/2 cup pecans over the butter and sugar.  Place the rolls in the pans, so they are snug against each other (this will the allow the rolls to rise up rather than out).  Bake for 20-25 minutes or until golden brown.

Turn the rolls upside down onto a serving platter, making sure to spoon any remaining caramel topping from the bottom of the pan onto the rolls.  Put the platter on the table and pull them apart, throw one (or two!) on your plate and then...

Eat it!!!

Thursday, April 26, 2012

Milk Bar Grasshopper Pie


I have a wicked crush on a girl.  And my husband is ecstatic about it.  (And no...don't even go 
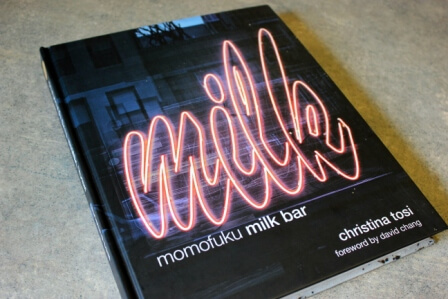
there.)  This is not a crush born of carnal need or lust.  It is a crush born of sugar, chocolate and a woman who is so full of baking genius it makes me gush with love.  Many of us are familiar with her, and if you are, you probably have a crush too.  Christina Tosi is simply amazing. 

Best baking cookbook I have ever laid eyes on.
I have seen Christina's (we can be on a first name basis, right?) recipes flying around the Internet lately.  After I saw the first one I knew I was in love.  Her recipes are incredibly involved with a multitude of steps to get to the final product.  Making one of her recipes is challenging and time-consuming and exactly what I crave when I devote my day to the kitchen.


These desserts are why my husband is happy about my crush.  He isn't jealous and he doesn't feel displaced in the least bit.  Desserts have been pouring into this household, and he's never one to complain about having sweets around.

The Grasshopper Pie was the first thing I chose to make when I got my grubby little hands on this book.  Regarding the level of difficulty, this was one of Christina's easier recipes. It still took some time, but it was fairly straightforward as far as baking techniques go.  I'm not going to lie...this pie was incredibly rich.  Like make-your-head-hurt sugary sweet.  It was awesome.  We figured out that if it is served from the refrigerator rather than at room temperature though, it mellows the sweetness and suddenly it is not just awesome, but swoon-worthy.


PRINT THIS RECIPE!

Milk Bar Grasshopper Pie

Graham Cracker Crust:

1 1/2 cups (90 g) graham cracker crumbs
1/4 cup (20g) dried milk powder
2 tablespoons sugar
3/4 teaspoon kosher salt
4 tablespoons (1/2 stick) unsalted butter, melted
1/4 cup (55g) heavy cream

Grasshopper Pie:
4 1/2 ounces 72% chocolate, roughly chopped
6 tablespoons unsalted butter
2 large eggs
3/4 cup (150g) sugar
1/4 cup (40g) all-purpose flour
3 tablespoons dutch-process cocoa powder
1/2 teaspoon kosher salt
1/2 cup (110g) heavy cream
2 tablespoons (20g) mini-chocolate chips
1/2 cup (25g) mini-marshmallows

Mint Cheesecake Filling:
2 ounces white chocolate
2 tablespoons grapeseed or canola oil
2 1/2 ounces (75g) cream cheese, softened
2 tablespoons powdered sugar
1/2 teaspoon peppermint extract
1/4 teaspoon kosher salt
2 drops green food coloring

Mint Glaze:
1 ounce white chocolate
2 teaspoons grapeseed or canola oil
scant 1/8 teaspoon peppermint extract
1 drop green food coloring

Preheat oven to 350F.

Make the graham cracker crust: Whisk graham cracker crumbs, milk, sugar and salt in a medium bowl to thoroughly combine.  Whisk the butter and cream together and add to the dry ingredients.  Using your hands, toss all the ingredients together to evenly coat.  As you are tossing, it will start clumping together.  Press it together with your finger tips and it should hold its shape.  If it doesn't, add up to an additional 1 1/2 tablespoons of melted butter until desired consistency.

Add 1 1/4 cups (110g) of graham cracker crumb mixture to a 10-inch pie pan.  Working with your hands press the mixture on the bottom and up the sides of the pie pan.  Set aside.

Make the chocolate filling: Combine butter and chocolate in a small bowl and microwave for 30 seconds.  If mixture is not mostly melted, microwave an additional 20-30 seconds.  Use a spatula to stir ingredients together until silky and smooth. 

Combine the eggs and sugar in a stand mixer fitted with the whisk and whip for 3-4 minutes.  You will know they are done when they reach the ribbon state, which Christina describes as this: detach the whisk and dunk it into the egg mixture.  Wave it back and forth like a pendulum and the mixture should form thick silky ribbons that fall and then disappear into the mixture.  Continue whipping mixture until it reaches this state.

Change stand mixer attachment to the paddle.  Add the melted chocolate mixture into the eggs and paddle briefly on low and then increase the speed to medium for one minute or until the entire mixture is completely brown with no streaks remaining.  Scrape down the sides of the bowl with a spatula.

Add flour, cocoa and salt to the egg and chocolate mixture and paddle on low for 1 minute or until no lumps of dry ingredients remain.  Scrape down the sides of the bowl with a spatula. 

With the mixer on low, slowly pour in the heavy cream and mix for 30-45 seconds or until the cream is fully incorporated and no white streaks remain.  Scrape down the sides of the bowl with a spatula.

Remove mixer bowl from mixer and gently fold in 1/4 cup (45g) of remaining graham cracker crust crumbs.

Make the mint cheesecake filling: In a heat proof bowl, combine the white chocolate and oil and microwave for 30 seconds. If mixture is not mostly melted, microwave an additional 20-30 seconds. Use a spatula to stir ingredients together until silky and smooth. 

Combine cream cheese and powdered sugar in a stand mixer fitted with the paddle and mix on medium-low for 3 minutes.  Scrape down the sides of the bowl.  With the mixer on low, slowly add the white chocolate mixture and paddle for 1-2 minutes or until completely combined.  Scrape down the sides of the bowl. 

Add peppermint extract, salt and food coloring to the mixer bowl and paddle for 1-2 minutes or until thoroughly combined and the mixture is consistently green.

Assemble the pie: Place the graham cracker pie shell on a baking sheet.  Pour the mint cheesecake filling into the pie crust and spread evenly over the bottom.  Pour the chocolate mixture on top of the mint filling and spread evenly to the edges.  Sprinkle the mini-chocolate chips in a bulls eye around the center and then the marshmallows around the outer edge of the pie. 

Bake for 25 minutes until the edges are slightly puffy and the center still jiggles just a little bit.  The marshmallows will be tanned and the chocolate chips will have just started melting at this point.

Cool the pie completely before adding the mint glaze.

Mint Glaze: In a heat proof bowl, combine the white chocolate and oil and microwave for 30 seconds. If mixture is not mostly melted, microwave an additional 20-30 seconds. Use a spatula to stir ingredients together until silky and smooth.  Stir in the peppermint extract and food coloring until completely homogeneous in color.  Allow to cool for 15-20 minutes.

Using a fork, dunk the tines into the mint glaze and dangle the fork over the pie to create crisscrossing lines on the pie.  Put the pie in the fridge for 4-6 hours before serving to thoroughly chill (Christina doesn't say to do this, so it is a preference on my part, but we found the pie was significantly less rich and much more delicious eaten this way).  Once the pie is thoroughly chilled, cut it into slices and...

EAT IT!!

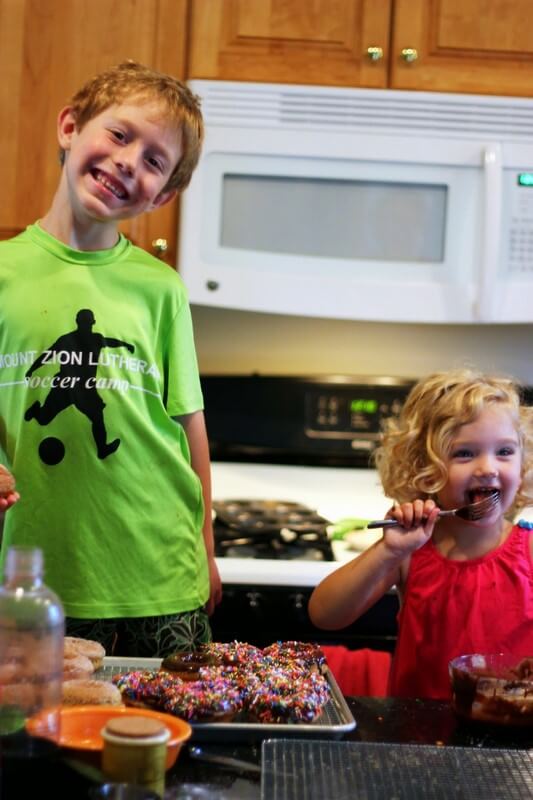
I caught a little pie-snatcher in the act!

Monday, February 20, 2012

Brown Butter Lemon Bars


If you know anything about my culinary passions, you know:

1. That I believe a little brown butter can make anything taste better.
2. Lemon desserts do not pass these lips. 
3. Ever.
4. Never Ever.
5. Unless...(see #1 above).

I heard your collective gasp, and I understand your confusion.  But let me help you understand, its pretty easy.  A little brown butter can make anything taste better.  Or even good.

I don't know what it is about me and lemons, but we just don't dig each other when it comes to desserts.  I 'll add lemon to risottos, pastas, roasted vegetables and dips.  But please, keep that fruit away from my sweets.  Except for this one time.

Here's the deal, I am not going to say I love these lemon bars and they are my new favorite dessert.  But, they were pretty good.  I ate a whole bar and I didn't even cry when I remembered I wasn't going to hit any chocolate. 

So, why, you ask, would I choose to make something I am so obviously at odds with in the first place?  I made them for this lady.  My mama. 


She and my dad were here visiting this past weekend and since her birthday was just a few days prior I had to make her something extra special.  Lemon bars were that thing.  More on that awesome visit to come, but now, without further ado...I present to you:

BROWN BUTTER LEMON BARS!


PRINT THIS RECIPE!

Brown Butter Lemon Bars
Adapted from Baking by James Peterson

16 servings

DOUGH
2/3 cup (94 grams) all-purpose flour
2/3 cup (94 grams) cake or pastry flour
1/2 cup powdered sugar
1/4 teaspoon kosher salt
1/2 cup cold unsalted butter, cut into 1/2" cubes
1 egg

LEMON CURD
1/2 cup unsalted butter
3 large eggs
3/4 cup granulated sugar
1 tablespoon lemon zest
3/4 cup fresh lemon juice (about 6 lemons)

Make the dough: combine the flours, powdered sugar and salt in a food processor and pulse until combined, about 5 pulses.  Add the butter and egg and process for 20-30 seconds or until the mixture just comes together.  Flatten into a disk shape, wrap in plastic wrap and refrigerate for at least 15 minutes.

In a medium saucepan, melt the butter on medium heat until light brown and the butter has a nutty fragrance.  Watch the butter carefully and remove from the heat as soon as it browns to avoid burning.  Set aside to cool for 10 minutes.

Preheat the oven to 450F. 

Make the lemon curd: Bring a saucepan of shallow water to a simmer.  In a heatproof bowl that will fit over the saucepan, add eggs and sugar and whisk for 2 minutes until the mixture is pale yellow.  Whisk in lemon zest, juice and brown butter and then set the bowl over the simmering water.  Whisk constantly for 8-10 minutes until the mixture starts to thicken.  Remove from the heat and cover with plastic wrap.  Press the plastic wrap onto the surface of the curd to avoid forming a skin.  Set the lemon curd aside.

Roll the dough out into a 9" x 9" square and then press the dough into an 8"x8" baking dish.  Press the extra inch of dough up the sides and then trim any excess dough to form an even crust all the way around.  Bake for 20-25 minutes, or until the crust is light golden brown.  Let the crust cool for 15 minutes on a wire baking rack.

Spread the warm lemon curd over the warm pastry and let cool for 30 minutes at room temperature.  Cover and refrigerate for at least two hours and up to one week, before serving.

Cut into squares and...

Eat it!!

Tuesday, February 7, 2012

Kitchie Tip: Flour Duster


This lil guy?  He rocks my world.  He used to be an empty container with a sifter lid that I picked up at our local health food store.  He cost a whopping 99 cents.  I picked him up in the bulk spice aisle, so he was most certainly destined to be filled with something exotic like garam masala.  But I altered his destiny...I filled him flour and I use him lovingly almost every day.  How many spice jars can compete with that?

I was tired of the constant mess I dealt with because of dusting the counters when working with dough.  So, when I saw something similar to this somewhere on-line, I knew I had to make my own.  Its a game changer.

I always keep this on my counter so I can quickly grab it and dust flour to and fro! It sprinkles a light dusting of flour evenly and quickly.  It's always within arm's reach.  It means no more plunging my sticky, doughy hands into a bowl of flour and then having to throw the leftover flour out.  It is so purposeful.

I use it to dust the counter when laying out pasta, to dust the top of my pie crusts as I roll them out, and I even use it when I'm kneading bread.

You know you want one.  You know you deserve it.  So now, go out and get yourself a cute little spice jar with a sifter top and dust away!  It'll be the best 99 cents you've ever spent.